Automatic Repair is a built-in tool within the Windows operating system that helps analyze and resolve issues preventing the system from booting properly. This utility exists in most Windows versions for ease of use. If your computer fails to start correctly three times consecutively, this tool will automatically activate to diagnose and fix the problem.
You can simply understand that Automatic Repair is the first line of defense for the system to help the computer resolve boot failures. However, when your system encounters a repetitive boot failure loop, your PC will also repeatedly activate Automatic Repair. At this point, you will be stuck in the automatic repair loop of the system and unable to escape.
Therefore, Tpshare will guide you on how to fix the Automatic Repair error in Windows 10,11 that you can apply on your own computer.
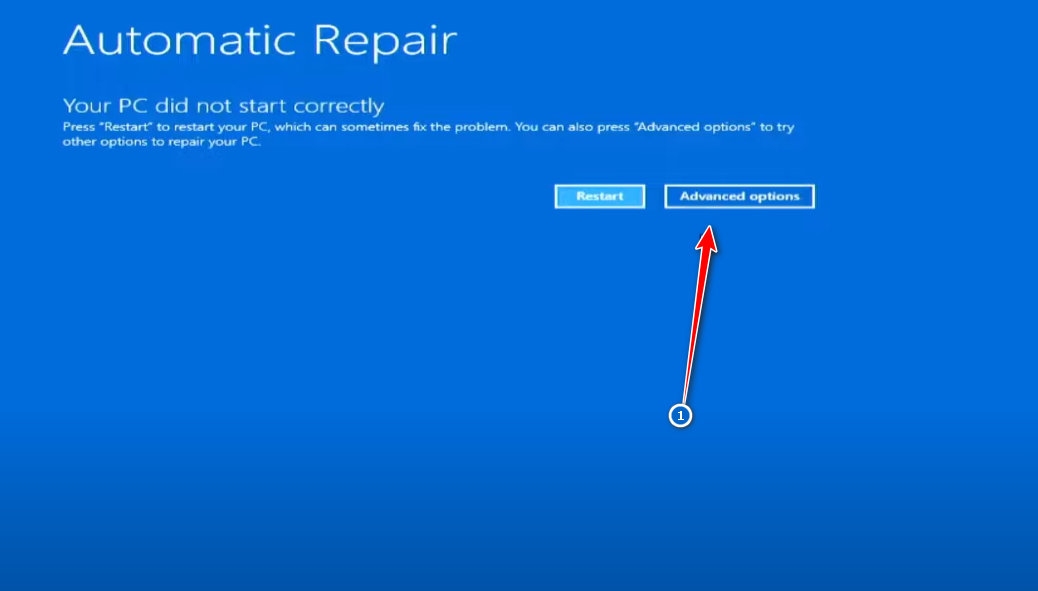
- Step 1 : Click on Advanced Options.
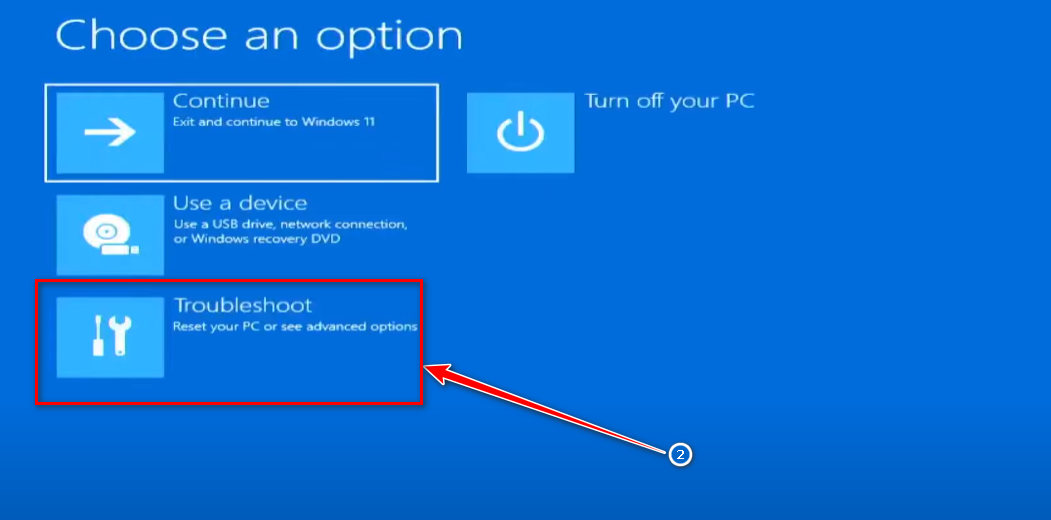
- Step 2 : Click choose Troubleshoot.
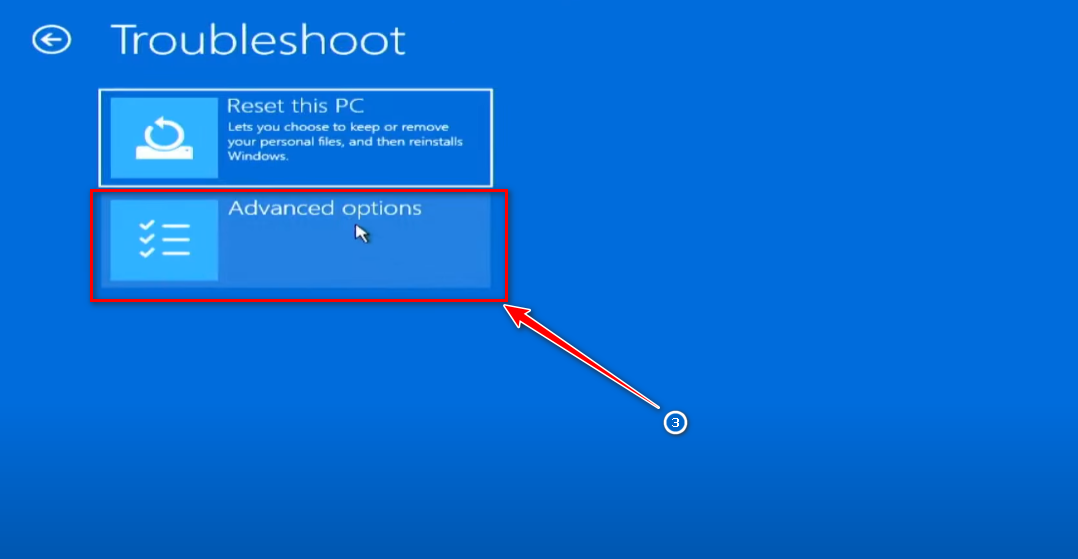
- Step 3 : Click choose Advanced Options.
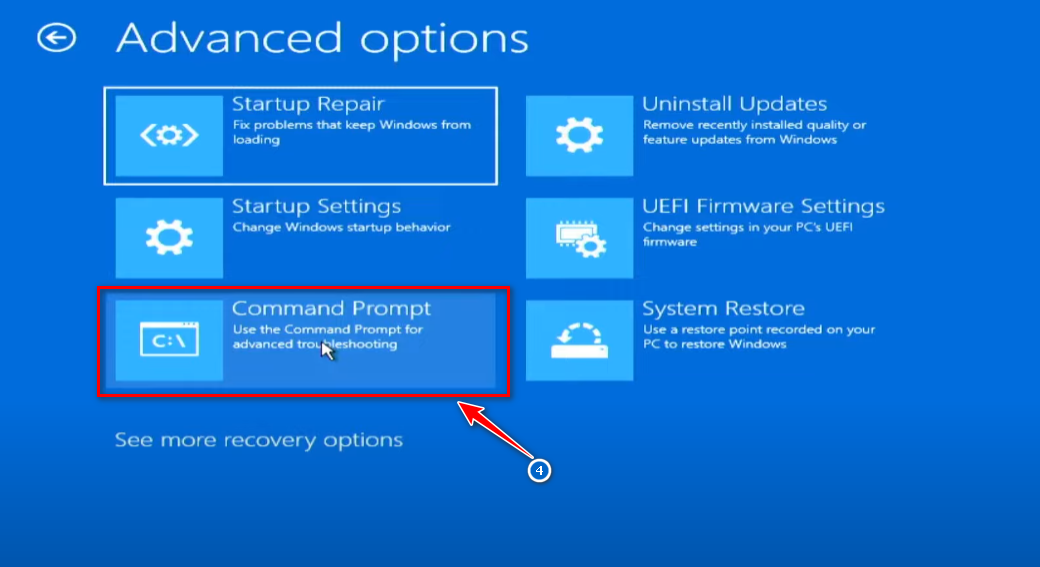
- Step 4 : Click on Command Prompt.
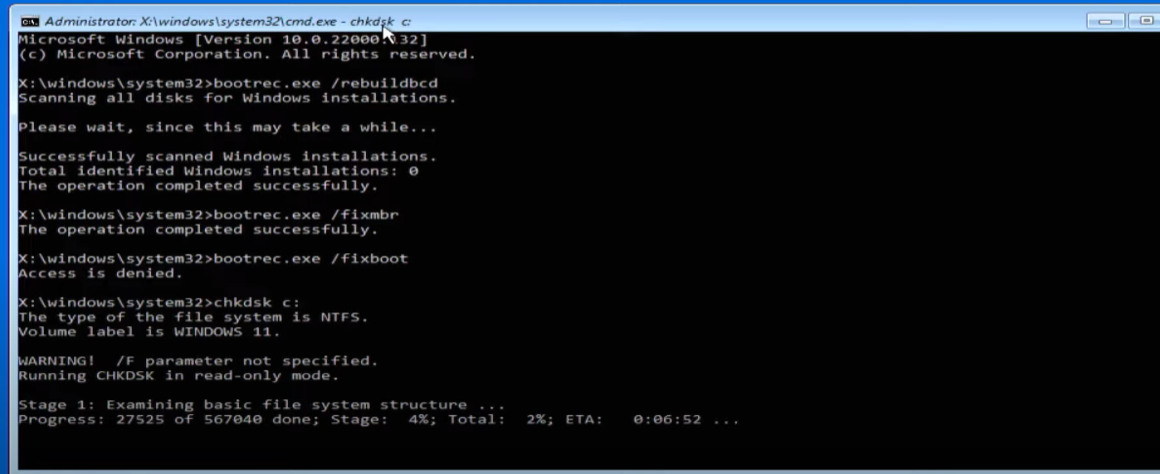
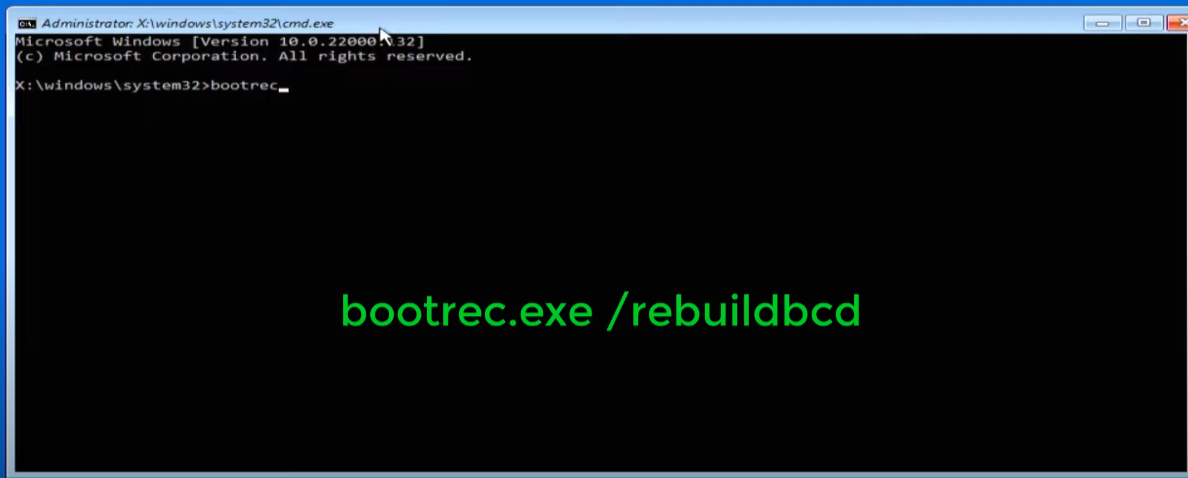
- Step 5 : Here, you guys type the command bootrec.exe /rebuildbcd
- Step 6 : Next, you type the command bootrec.exe /fixmbr
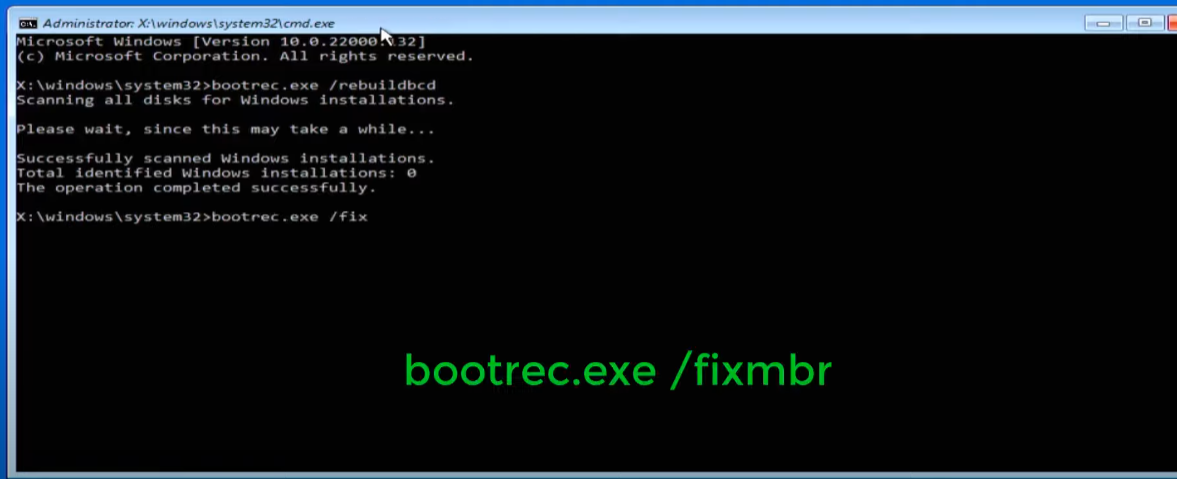
- Step 7 : Next, you type the command bootrec.exe /fixboot
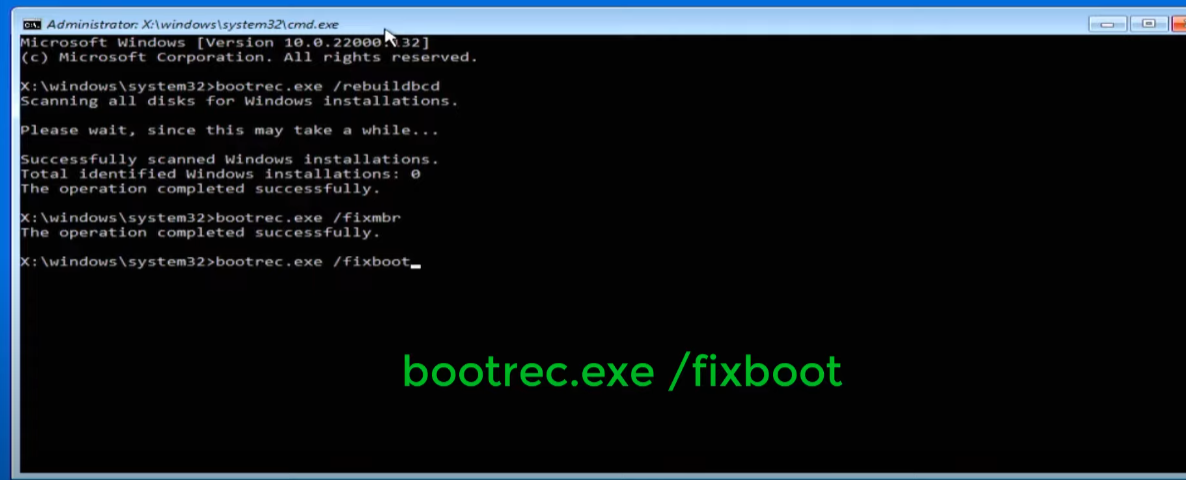
- Step 8 : Next, you type the command chkdsk c: (For the purpose of checking drive C to recover corrupted files.)
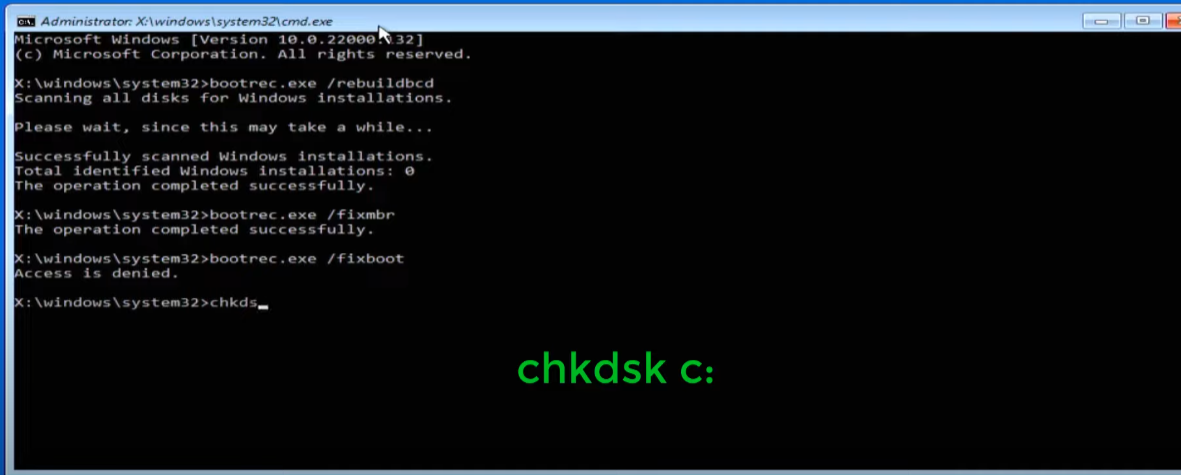
Please wait for the error correction process to complete.
